What tools do you need for plastering
What Tools do you need for plastering
Plastering is a construction technique that involves applying plaster to walls, ceilings, or other surfaces to create a smooth or textured finish. To achieve a professional result, specific tools are essential. Here’s a detailed explanation of each key tool used in plastering:
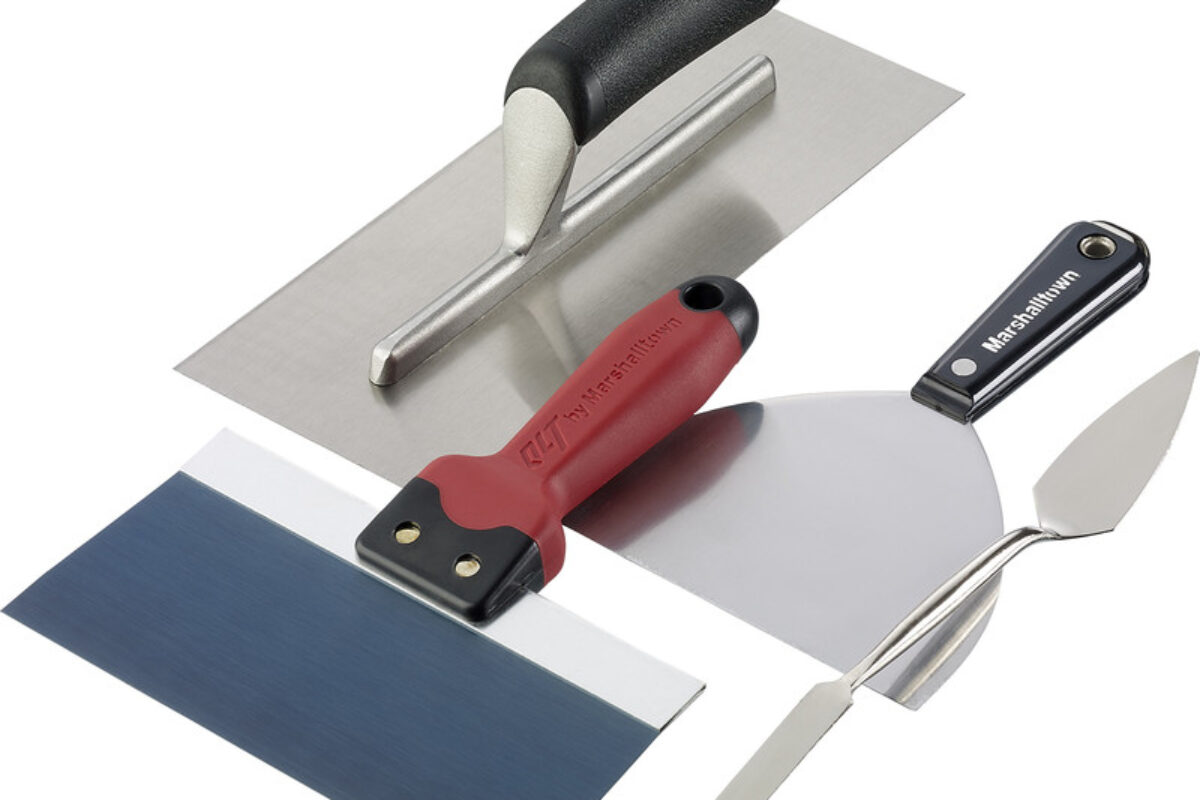
1. Plastering Trowel
- Description: A plastering trowel is a flat, smooth metal tool with a handle. It is usually made of stainless steel to prevent rust and ensure a smooth finish.
- Use: This tool is used to apply and spread plaster evenly on the surface. The smooth surface of the trowel helps achieve a flat, polished finish.
2. Hawk
- Description: A hawk is a flat square piece of metal or plastic with a handle underneath.
- Use: It serves as a portable tray to hold plaster while you work. The plaster is loaded onto the hawk and then scooped off with the trowel to be applied to the wall or ceiling.
3. Plastering Float
- Description: A plastering float is similar to a trowel but typically has a larger surface area and is made from a different material like wood, plastic, or sponge.
- Use: After applying the plaster, the float is used to smooth and level the plastered surface. It can also be used to create specific textures if desired.
4. Bucket Trowel
- Description: A bucket trowel is a small, robust trowel with a wide blade, often with slightly upturned edges.
- Use: It is used to scoop plaster out of a bucket or mixing container and onto the hawk or directly onto the wall. Its design makes it easier to transfer material without spilling.
5. Mixing Bucket
- Description: A mixing bucket is a large, durable container, often made of plastic or rubber.
- Use: This is where plaster is mixed with water. The size of the bucket allows for the proper amount of plaster to be mixed at once.
6. Plaster Mixer
- Description: A plaster mixer can be a manual whisk or a mechanical drill attachment that has a mixing paddle.
- Use: It is used to mix plaster and water thoroughly until a smooth, lump-free consistency is achieved. A mechanical mixer is preferred for larger batches, ensuring the plaster is evenly mixed.
7. Plastering Angle Beads
- Description: These are metal or plastic strips with a right-angled edge.
- Use: They are attached to external corners of walls before plastering. Angle beads help to reinforce the corners and provide a straight, sharp edge for the plaster.
8. Spirit Level
- Description: A spirit level is a long, straight tool with one or more vials of liquid and an air bubble inside.
- Use: It is used to ensure the plastered surface is level and flat. The air bubble in the vial indicates whether the surface is perfectly horizontal (level) or vertical (plumb).
9. Jointing Knife or Scraper
- Description: A jointing knife is a flexible, flat blade with a handle.
- Use: This tool is used to smooth out plaster around edges, seams, and tight corners. It’s also useful for applying joint compound to plasterboard seams.
10. Sanding Block or Sandpaper
- Description: A sanding block is a hand-held tool to which sandpaper is attached, or you can use loose sandpaper.
- Use: Once the plaster has dried, a sanding block or sandpaper is used to sand down any rough or uneven areas to achieve a smooth finish.
11. Corner Trowel
- Description: A corner trowel has two wings forming a 90-degree angle, with a handle in the middle.
- Use: It is specifically designed for applying plaster to corners, ensuring a sharp, even edge where two walls meet.
12. Brush
- Description: A soft-bristle brush or sponge brush.
- Use: After the plaster is applied, a brush can be used to gently dampen the surface to aid in smoothing or to create certain textures. It can also clean up edges where the plaster meets trim or other surfaces.
13. Measuring Tape
- Description: A flexible ruler used for measuring distances.
- Use: It’s crucial for measuring areas to ensure you mix the right amount of plaster and cut any plasterboard to the correct size.
14. Dust Sheets
- Description: Large sheets made from cloth or plastic.
- Use: These are used to protect floors, furniture, and other surfaces from plaster splashes and dust.
15. Safety Gear (Gloves, Goggles, Mask)
- Description: Personal protective equipment (PPE) such as gloves, safety goggles, and a dust mask.
- Use: Gloves protect hands from harsh materials; goggles protect eyes from dust and splashes, and a mask prevents inhalation of plaster dust.


